Subsea ToFD – Time of Flight Diffraction
Underwater Weld Inspection with ToFD
ToFD is a Non-Destructive Testing (NDT) technology that is widely recommended for detecting cracks and weld root erosion/corrosion below weld caps on subsea pipelines.
It is integral to TSC Subsea’s Advanced Ultrasonic (AUT) offering. Our underwater weld integrity assessments provide complete coverage of a weld and deliver a higher Probability of Detection (POD) compared to other subsea weld inspection methods.
ToFD stands for Time-of-Flight Diffraction, an advanced ultrasonic inspection technique primarily applied in the examination of welds.
It holds a pivotal role in Non-Intrusive Inspection (NII) surveys, as outlined in DNV-RP-G103. TSC Subsea’s ToFD system ensures comprehensive data collection with full encoding, guaranteeing complete weld coverage.
This significantly enhances the Probability of Detection (POD) for identifying weld flaws and in-service cracking, aiding engineers in formulating optimal repair strategies. This, in turn, contributes to the improvement of Risk Life Assessment (RLA) and Risk-Based Inspection (RBI) maintenance programs.
Weld Root Erosion/Corrosion typically manifests beneath the weld cap, making direct inspection using conventional ultrasonic 0° techniques unfeasible without weld cap removal. ToFD circumvents this limitation by employing probes on either side of the weld cap.
Acknowledged as the most reliable method for detecting and sizing Weld Root Erosion/Corrosion (HOIS(09)RP2 Issue 2), ToFD provides recordable weld data comparable to Radiography but without the associated safety hazards of radiation.
ToFD is also the most accurate tool for through wall height/ remaining ligature sizing and is less sensitive to defect orientation, such as lack of fusion/crack type flaws.
Subsea ToFD Setup
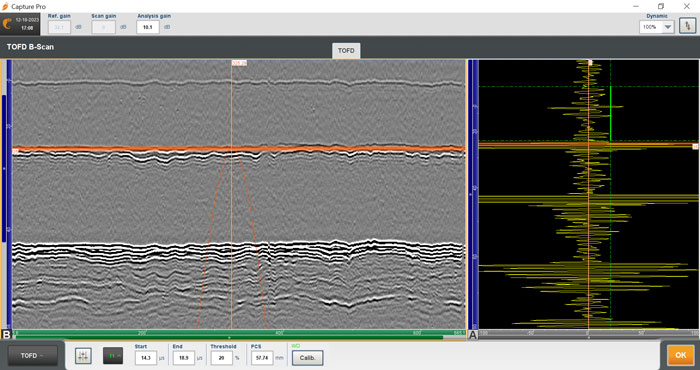
ToFD operates by employing a pair of ultrasonic probes positioned on opposing sides of a weld. One probe transmits an ultrasonic pulse, which is then received by the probe on the opposite side.
In areas without damage, the receiver probe detects two waves: one travelling along the surface (lateral wave) and another reflecting off the far wall (back-wall reflection).
When a flaw like a crack is present, the ultrasonic sound wave diffracts from the top and bottom tips of the crack. By measuring the time it takes for the pulse to travel, the depth of the crack tips can be automatically calculated using trigonometry.
This method offers superior reliability compared to traditional radiographic, pulse echo manual UT, and automated UT weld testing methods.


